Formaletta Walls

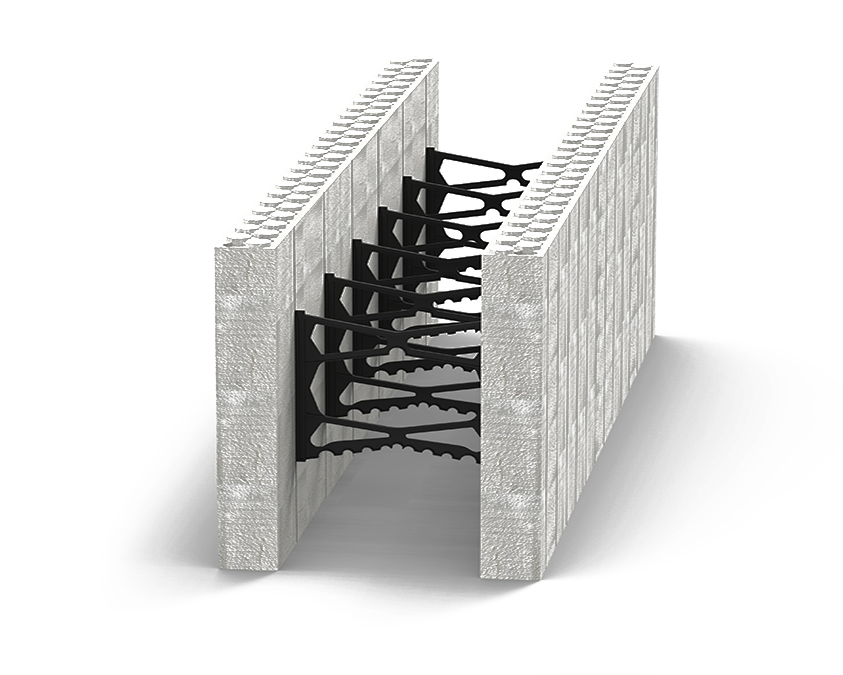
What are Insulated Concrete Forms?
Insulated Concrete Forms (ICF) are styrofoam blocks with plastic webs which stack together. Concrete is poured into them. It is an alternative to conventional wood or concrete framing systems. It provides numerous benefits including superior insulation, efficiency in building, superior sound insulation, moisture resistance, eco-friendliness. In short, it helps you have a stronger, better, healthier home.
Advantages
-
-
Superior insulation
The foam walls provide thermal resistance rating of R-25.
-
-
-
Proven strength
They provide greater wind shear and seismic stability and safer shelter against fires.
-
-
-
Efficiency
They decrease labour as there is no need to insulate or to install a vapor barrier of structurally framed exterior walls.
-
-
-
Better sound insulation
They can easily achieve a sound transmission classification of STC 50.
-
-
-
Moisture resistance
They improve air quality and they don’t need an extra vapor barrier.
-
-
-
Environmentally friendly
Foam Panels are partially made from recycled polypropylene.
-
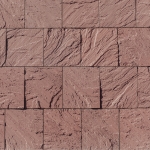
FINISHES FOR ICF’s

Plaster
Drywall
Tile
Panelling

Brick
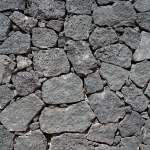
Natural Stone

Synthetic Stone

Stucco
Vinyl Siding

Wood Siding

Hybrid Combinations
QUICK INSTALLATION GUIDE

Step 1:
How to place footing/slab
How to place footing/slab
1. To ensure the best results, the footing or slab should be level (¼” all around).
2. You can use a chalk line to mark wall locations on the footing or slab.
3. The packaged forms should be put inside the perimeter of the footing.
4. Check local building code and Project Engineer instructions to know where to place reinforcing dowels when pouring footing or slab.
5. These dowel spacing instructions will keep dowels from intervening with webs:
-
6” 90” Corner: Put the first dowel 5-½” inwards from one of the outside edges and 8-½” from the other outside edge (see diagram A). Put the second dowel in reversing those measurements. Put in remaining dowels in 6” increments as per your engineering requirements (meaning, 6”, 12”, 18”, or 24” apart).
-
8” 90° Corner: Put the first dowel 6-½” inwards from one of the outside edges and 10-½” inwards from the other outside edge (see diagram B). Put the second dowel in reversing those measurements. Put in remaining dowels in 6” increments as per your engineering requirements. Center the steel between the webs.
6. Where you need step footing, set up the step at 16” increments so that it aligns with the courses. If you need an 8” step, the block may be out in half horizontally.
7. You could also consider dropping a ½” or 5/8” rebar rod in the circular hole of the corner web for further reinforcement.

STEP 2:
HOW TO PLACE COURSING
HOW TO PLACE COURSING
1. Before setting forms, you need to know the exact wall height that the project requires. When the wall height required is not divisible by 16”, one or two courses may need to be cut horizontally. Make sure to preserve all cross web members, when you’re choosing the cut.
2. Corner formers should be set level and plumb, while straight forms should be set moving from all four corners into the center. Make sure you put in the first course of corners with the long side going in the same direction. Then reverse every other course in the opposite direction so that the courses offset and create a 1’ stagger.
3. When you cut blocks vertically centered between two interlocks such that they will not intervene with the already functional interlocking blocks. If you can’t adjust wall dimensions, you can create a stacked joint and place it under a window or at the center of the door so that its effect is as minimal as possible. This cut should be placed 4 to 6’ from a corner. Remember that the horizontal rebar should be put in as the Formaletta Wall forms are stacked, according to engineering requirements (See step 4).

STEP 3:
HOW TO MAKE/INSULATE DOOR & WINDOW OPENINGS
HOW TO MAKE/INSULATE DOOR & WINDOW OPENINGS
1. Formaletta Walls is an ICF bucking material used to make and insulate window and/or door openings. For overhead garage doors, use dimensional lumber.
2. Mark footing or slab where the openings of the doors or windows will be.
3. When you know where the windows and doors will go and what size they will be, you can determine whether you need to cut blocks horizontally for setting bucks between block courses. Make sure you’re very careful when you cut through block webs. Also, you may need additional bracing of blocks.
4. You can pre-assemble window and door bucks so that the cross-bracing is already in place. Allow .” oversizing of bucks in both directions over the actual window or over pre-built door frames. Most manufacturers will provide the frame opening size which so you can determine whether they will work with concrete walls. This way you can plumb and level the window or door if anything moves while you’re placing the concrete.
5. Make sure you cross brace all buck openings safely. The foam glue bucks into place when you’re done installing and ready to pour.
Review the Formaletta Wall installation manual for more information.

STEP 4:
HOW TO REINFORCE STEEL
HOW TO REINFORCE STEEL
1. You’ll need 1-1/4” length rebar collars that you can make out of a 1-1/4” PVC pipe with a skill saw. Place these over the vertical dowels that stick out from the footing or slab before you stack the second course. Make sure you check local codes to make sure collars are allowed in your area.
2. Snap the horizontal rebar into the web fingers of the first course, alternating rebar courses left and right of center. Then place every other rebar course in the same rebar finger positions.
3. Continue staggering in this manner. This ensures that the vertical bar will be held between the horizontal bars.
4. Once you’ve stacked the entire wall, thread the vertical rebar between the horizontal rebars and place the end into the PVC collar. Then tie the vertical rebar to the top of the horizontal rebar. The vertical rebar must be 1” shorter than the top of the wall. You can pre-order the steel so that it’s the exact length it needs to be.

STEP 5:
SUCCESSIVE COURSES
SUCCESSIVE COURSES
1. Reverse the direction of each corner form to create a staggering of vertical joints. Keep doing the same around the perimeter, the same way you did in the first course. The blocks should be pressed together.
2. Complete the first three courses, string the walls, and shim.
3. If your footings or slabs are out of level, use wood door shims to either level areas that are low or trim the bottom of the block in areas that are high.
4. Every additional course should be set just like the first two courses. Remember to cut out window openings and reinforce them if necessary.
5. The bottom of each block on the top course should be spot glued 6” from the end of each block so that they are locked into place. It’s better not to clue the entire length so that there are problems with lift or interlock.
6. Install appropriate sized pipes for your building service penetrations.
7. Once the wall is completely stacked, pop the string line at the wall height you choose and trim the top of the wall level. Also, because the weight of the concrete presses the blocks tighter together, ICF walls may compress up to 1/16” per course.

STEP 6:
HOW TO INSTALL WALL BRACING
HOW TO INSTALL WALL BRACING
1. Regular Corners: Start 2 feet from inside the regular corner going in one direction and then 3 feet going in the opposite direction. This keeps braces from intervening with each other.
2. Inverse (inside) Corners: Start 4 inches from inverse corners. Attach braces to Formaletta Wall corner tie.
3. After that, place an alignment unit every 4-6 feet.
4. Every other course, fasten the bracing to the wall. The “BB” attach points are the strongest.
5. Make sure braces have at least one-inch vertical slots where you can screw in the attachments. Place the screws at the top of the vertical slots. Don’t tighten the screws too tight so that there’s no bowing from wall compression.
6. Installing wall bracing properly is very important for wall alignment. We advise contacting a distributor for support.

STEP 7:
CONCRETE PLACEMENT
CONCRETE PLACEMENT
1. When you place your order, request an “S” bend, ram’s horn, or reducer before the end of the hose. If possible, final size of hose should be reduced to 3”.
2. Begin pouring 4’ to 5’ from a corner such that you’re directing concrete flow towards the corner. Then keep moving along the wall. Remember not to pour directly down the corners.
3. When working around window and door bucks, make sure you alternate pour from side to side such that the buck is not moved sideways by the concrete pressure.
4. As the pour continues, fill the space below the bottom of any window opening or pipe sleeve entirely and make sure it is vibrated.
5. Internal vibration (3/4” or 1” pencil vibrator recommended) ensures proper consolidation of concrete. Vibrate all bucks completely, but make sure to not over vibrate.
6. Use 4’ lifts to place concrete with a moderate and steady flow.
7. Carry out the final alignment of each wall before the concrete sets.
8. When you finish the concrete top, place the anchor bolts or the plate straps into the wet concrete at the spots set out by the code.
9. Clean walls, bucks, and floors before the concrete hardens. Recheck wall alignment before leaving jobsite.
FINISHING THE JOB:
VAPOR BARRIERS AND WATERPROOFING
VAPOR BARRIERS AND WATERPROOFING
1. Now that all that’s done, don’t forget about waterproofing and vapor barriers. This should always be done according to local code requirements.
Applications

Walls
Three million air pockets make out panels the perfect isolator. Not only do they help with uniformly guarding against extreme temperatures and outdoor noise, they also help protect against fungus, termites, cracks, and humidity.

Pools
Insulation is also available for your pool, making water 10 to 20 degrees warmer for a fraction of the cost of other options. Our EPS technology is incredibly easy to install and maintain because they are lightweight, durable and strong. It also makes your pool much more energy efficient.

Office Buildings
Whatever your business, every work environment benefits from less noise pollution and more uniform, mild indoor temperatures. Our paneling helps you with this, while saving you money and ensuring that you are compliant with many environmental regulations.

Industrial Buildings
Industrial metal paneling is much quicker to set up than other paneling and provides more complete isolation from external factors like noise and weather. Our products are always flexible, easy to install, and eco-friendly. Roofing, wall systems, trims, you name it. We can help you with all of your industrial building needs.

Self Storage
Because our paneling protects against humidity, insects, fungus, and cracks, among other things, and because it helps to ensure a mild, even indoor temperature, it is one of the best things you can do for any self storage system. Old paintings, vintage furniture, delicate fabrics, all have a better chance of survival when using our products. Bikes, and surfboards and tools do too!
Other Products

Sandwich Panel Wall
Our insulated metal panels are made of a special insulating foam that is sandwiched between two layers of metal. This allows your roof to maintain a more even indoor temperature, regardless of what is happening outside! It’s strong, cost-effective, and eco-friendly.

Sandwich Panel Roof
Our panels are so flexible that they can be molded to fit a wide variety of shapes and sizes. Steel or aluminum panel facings create vapor, air, and moisture barriers, minimizing maintenance every step of the way.

Walk-in cooler
Our custom Walk-In Coolers are the best thing you can do to keep your produce fresh. Way less expensive than commercially marketed coolers, our walk-in refrigerators work with a normal window AC unit as the cooling system.

Custom EPS
We are here to make sure you get what you want. Didn’t see what you were looking for? We are happy to customize any of our paneling structures in order to best suit your construction needs.
Flepak Construction
Physical Address
Carr. 174 Km. 5.1
Bo. Guaraguao
Bayamón PR 00958
Mailling Address
P.O. Box 4321
Bayamon PR 00958-1321
Phone: (787) 506-2344
info@flepak.com